

How to Keep a Large Tactical Backpack Organized
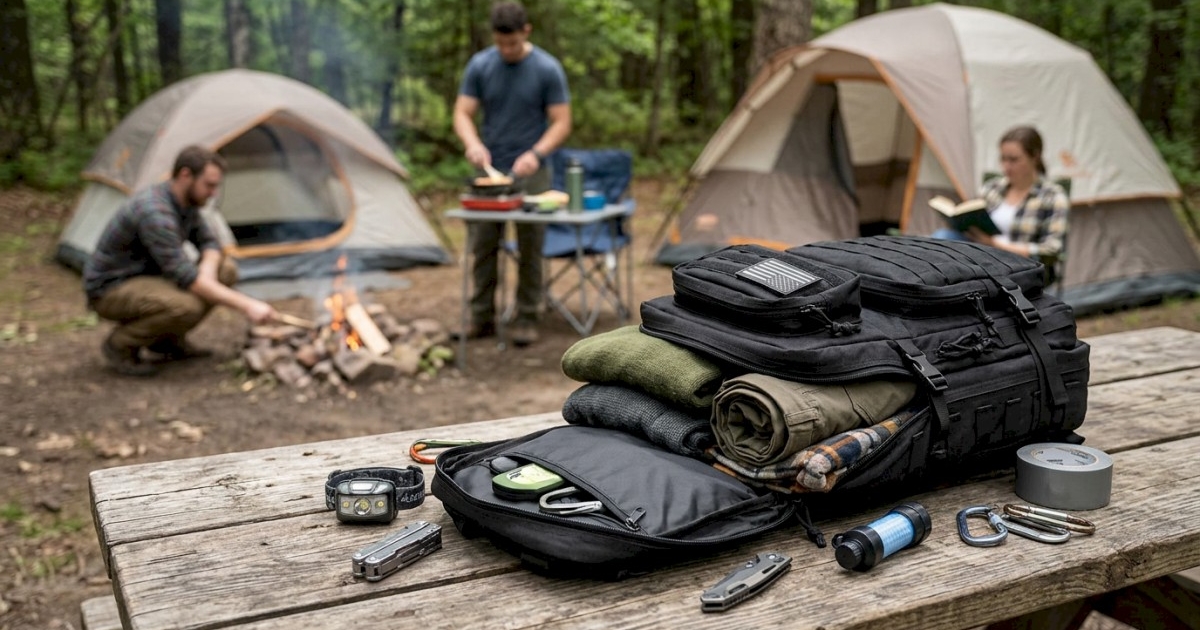
A large tactical backpack is more than a tote – it’s a mobile workstation, a travel hub, and sometimes even a makeshift gym locker. When the bag is a chaotic jumble of loose cords, crumpled shirts, and misplaced tools, you waste precious minutes digging, you shift your center of gravity, and you risk damaging delicate equipment. The real power of a high‑capacity pack shows up when every item has a home and you can pull what you need in seconds. That predictability translates into smoother commutes, quicker gear changes during a workout, and less strain on your shoulders when you’re on a long hike. In short, a disciplined layout turns a bulky bag into a reliable partner rather than an unpredictable weight.
But the difference isn’t magic; it’s a series of intentional choices. By treating each pocket, sleeve, and external strap as a purpose‑built zone, you eliminate the “where did I put that?” moment and keep the load balanced. The following sections walk you through a systematic approach that works for everyday users, gym‑goers, and weekend travelers alike.
Assessing Your Backpack’s Architecture
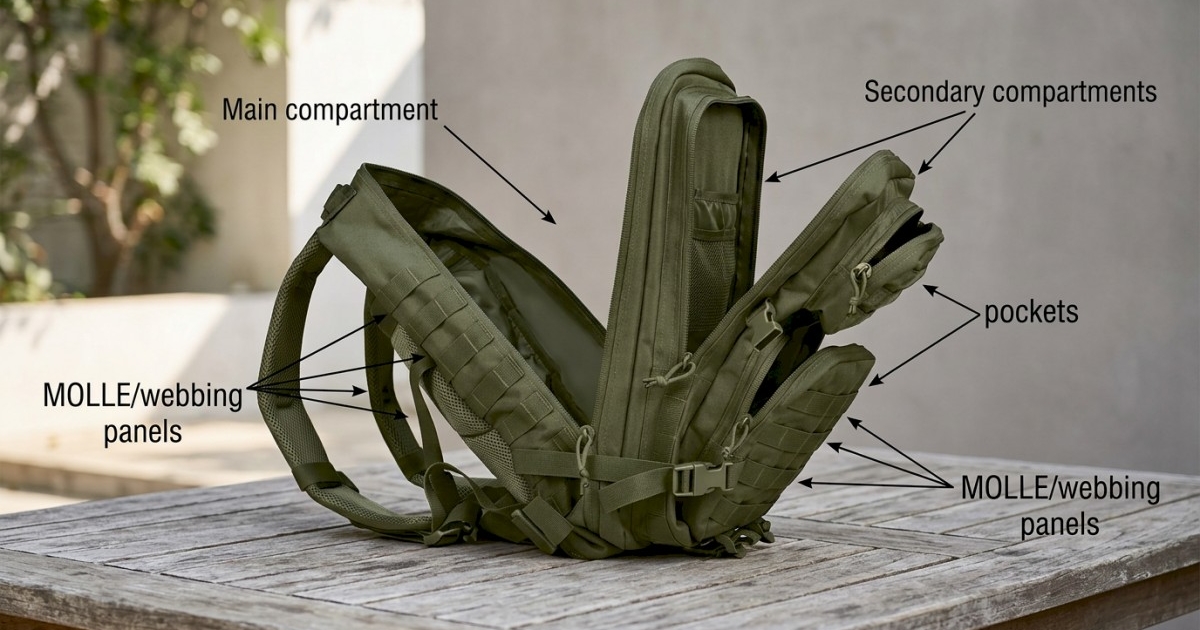
Before you even start loading gear, take a few minutes to map out the interior and exterior of your pack. Most large tactical backpacks—typically 35 L to 45 L—feature a main compartment, a secondary zippered pocket, a front organizer panel, side mesh sleeves, and a series of MOLLE or modular webbing panels. Some models also include a dedicated laptop sleeve, a hydration bladder compartment, and a removable lid that doubles as a day‑pack.
Main compartment: This is the heart of the bag. It’s the largest volume and should house bulkier items that need protection—think jackets, spare shoes, or a rolled‑up blanket. Because the weight sits close to your back, keep the heaviest objects centered and low to maintain a stable posture.
Secondary compartments and pockets: Use these for mid‑size items you’ll need often but don’t want to jam in the main space—like a notebook, a compact power bank, or a small first‑aid kit. External zippered pockets are perfect for rain‑gear, a change of shirts, or a snack bar you want to grab on the fly.
MOLLE/webbing panels: These are the true tactical advantage. Attach pouches, tool belts, or a hydration bladder with Velcro or clips. Because they sit on the outside, they’re ideal for quick‑access gear such as a multitool, flashlight, or a pocket‑sized notebook.
By recognizing each zone’s strengths, you can assign a role to every piece of equipment before the first zip.
Building a Repeatable Packing System
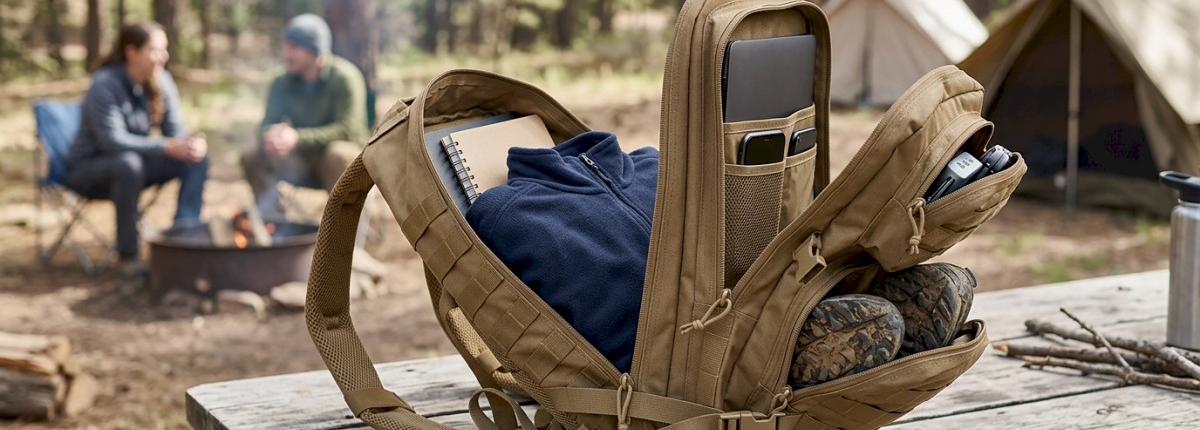
The cornerstone of any organized backpack is a repeatable system. Think of it like a recipe: once you’ve nailed the steps, you can reproduce the result every time you pack. The most effective method is to sort items by frequency of use, size, and protection needs.
1. Frequency‑First Layering
Place the items you reach for multiple times a day at the top of the main compartment or in a front‑access pocket. This includes your phone, wallet, transit pass, and maybe a small water bottle. Anything deeper in the pack should be items you only need occasionally—like a spare pair of shoes or a compact travel pillow.
2. Size‑Based Zoning
Bulk items (jackets, folded blankets, larger electronics) belong in the bottom half of the main compartment. Mid‑size gear (books, a compact lunch box, a power strip) should stack above the bulk items. Finally, small accessories (cables, pens, earphones) fit into dedicated pouches or zippered mesh pockets that sit near the top.
3. Protection Allocation
Delicate equipment—laptops, cameras, and tablets—needs a padded sleeve or a hard‑shell case. Keep these in a dedicated laptop sleeve or a crush‑proof compartment, preferably against the back panel to shield them from external impacts. Items that can tolerate a bit of movement (e.g., a soft rain jacket) can be placed in the outer mesh sleeves.
By following this hierarchy each time you pack, you develop muscle memory and reduce the time spent hunting for the right spot.
Using Modular Inserts and Pouches
Even the smartest layout can fall apart if small items are loose. This is where modular inserts shine. Foam or fabric dividers slip into the main compartment and create custom‑shaped cubbies for things like a portable charger, a set of cables, or a compact grooming kit. If your pack has MOLLE webbing, consider a set of low‑profile pouches that snap on—these act like mini‑drawers and keep gear from bouncing around.
A few favorite insert types:
- Cable organizer roll: Roll all cords together and secure with a Velcro strap; slip the roll into a small zippered pocket.
- Utility pouch with interior mesh: Great for pens, small tools, and USB drives. The mesh keeps items visible.
- Hydration bladder holder: If you use a 2‑liter bladder, a dedicated sleeve prevents it from shifting and maintains even weight distribution.
The key is to keep the number of inserts manageable—too many create dead space. Pick the ones that solve a specific problem and store the rest in the bag’s built‑in pockets.
Mastering Compression Techniques
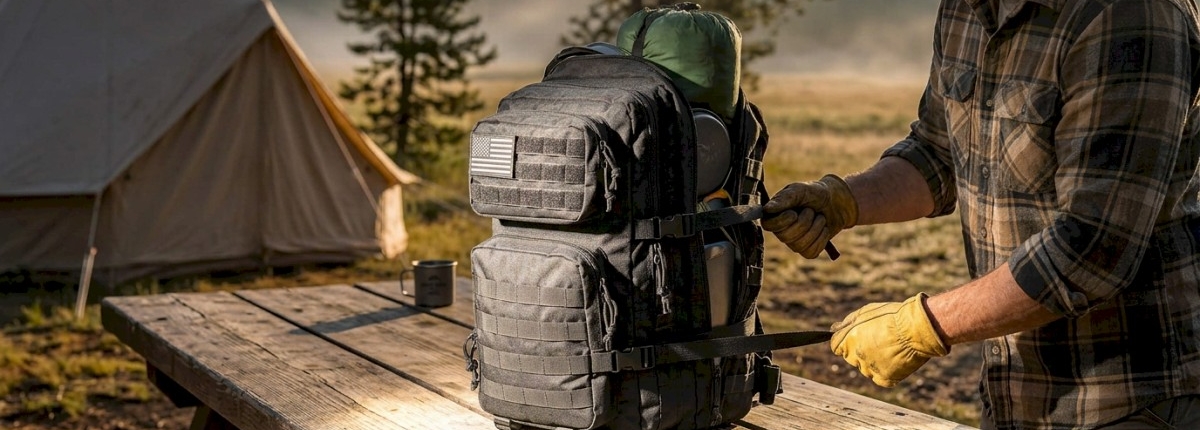
Compression isn’t just for backpacks meant for trekking; it’s a powerful tool for any large tactical bag. Most models feature internal compression straps that pull the fabric tight, eliminating gaps that allow items to slide.
When you place a bulky jacket at the bottom, zip the top of the main compartment, then pull the internal straps until the jacket is snug against the back panel. For softer items like a rolled‑up blanket, use a compression sack—essentially a small, zippered bag that you can cinch down with its own straps. This keeps the item compact and prevents it from bulging out of the bag’s silhouette, which can affect balance.
Remember to avoid over‑compressing. If the strap is too tight, it can crease delicate electronics or make it hard to access items later. Aim for a firm, but not crushing, tension.
Managing Small Items and Accessories
The tiny stuff—cables, earbuds, spare batteries—are the biggest culprits of chaos. A good rule of thumb is the “one‑pouch‑per‑function” approach:
- Power hub pouch: Contains all chargers, power banks, and spare cables.
- Medical mini‑kit: Band‑aids, antiseptic wipes, a few pain relievers.
- Office kit: Pens, a small notebook, a USB drive, and a compact stapler.
Place each pouch in a visible zippered pocket or attach it to the MOLLE panel with a quick‑release clip. This way, you never have to rummage through a sea of loose cords; everything is already grouped and ready.
Preventing Overpacking While Staying Prepared
A 45 L bag can hold a weekend’s worth of gear, but that also means it’s easy to over‑pack. Overpacking adds weight, throws off the bag’s balance, and defeats the purpose of an organized system. Use a “three‑item rule” for each category:
- Essential daily items – wallet, phone, keys, water bottle.
- Task‑specific gear – gym clothes for a workout day, travel documents for a trip.
- Backup items – an extra pair of socks, a spare charger.
If a category exceeds three items, ask yourself if each one truly adds value. This mental filter keeps the load lean and the compartments functional.
Adapting the Core Layout for Different Scenarios
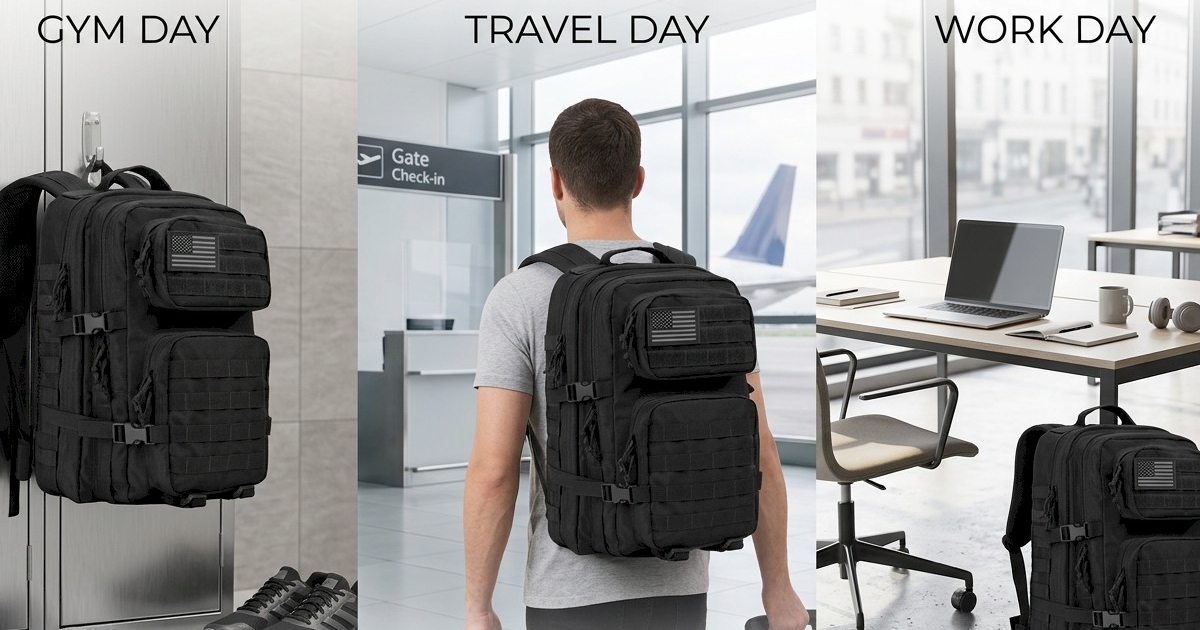
One of the biggest advantages of a tactical backpack is its versatility. Rather than rebuilding the entire system each time you switch from gym to travel, keep a core layout and swap out a few modular components.
- Gym day: Replace the laptop sleeve with a sweat‑proof laundry bag, add a small shoe compartment on the side mesh, and keep a water‑bottle pocket front‑center.
- Travel day: Insert a compression packing cube for clothing, attach a passport pouch to the MOLLE panel, and move the hydration bladder to the side sleeve.
- Work day: Keep the laptop sleeve, add a briefcase‑style organizer for documents, and tuck a portable coffee mug in the top zip pocket.
By only adjusting a handful of pieces, you preserve the muscle memory of where everything belongs, cutting down on packing time and mental load.
Daily Maintenance: The 2‑Minute Reset
Even the most meticulous system can degrade after a day of use. The secret to lasting organization is a quick daily reset. Before you close the bag at night, spend two minutes:
- Empty the front‑access pockets and return items to their designated zones.
- Shake out the main compartment to settle any shifted gear.
- Re‑engage compression straps to keep bulk items tight.
- Check the MOLLE panel for loose pouches and re‑clip if needed.
This habit reinforces the layout and prevents small messes from snowballing into a full‑blown overhaul the next morning.
Choosing the Right Backpack for Your System
While the focus of this guide is on organization, the right pack can make the process smoother. Look for these features when shopping:
- Multiple internal dividers or removable trays that let you create custom zones.
- Durable MOLLE webbing with sturdy clips for attaching pouches.
- External compression straps that are easy to reach and adjust.
- Water‑resistant zippers and a rain‑fly for protecting electronics.
- Ergonomic shoulder and hip straps that keep the load balanced even when fully packed.
Brands like Wolfpak, 5.11, and Maxpedition offer models that combine these elements with rugged construction, ensuring your organization system has a solid foundation.
Putting It All Together: A Sample Pack‑Out Routine
Below is a step‑by‑step illustration of the system in action for a typical weekday that includes a commute, a lunchtime workout, and an evening class.
- Start with the core layout – place the laptop in the padded sleeve at the back, tuck the hydration bladder in the side mesh, and lay the rolled‑up jacket at the bottom of the main compartment.
- Add mid‑size items – slide a compact lunch box and a power bank into the secondary zip pocket.
- Insert modular pouches – attach a “quick‑access” pouch with a multitool and a small flashlight to the left MOLLE panel, and a “tech” pouch with cables to the right panel.
- Top‑layer essentials – put the wallet, phone, and transit pass into the front zip pocket, and place a reusable water bottle in the external side pocket.
- Compress and secure – pull the internal straps to flatten the jacket, zip the compression sack for the blanket, and double‑check that all pouches are snug.
- Final check – stand with the pack on your shoulders, make sure it feels balanced, and do a quick “grab test” by reaching into the front pocket without removing the bag.
Following this routine takes about five minutes the first few times, then drops to under a minute as the motions become second nature.
The Bottom Line: Consistency Beats Complexity
Keeping a 45L large tactical backpack organized isn’t about buying a dozen accessories; it’s about developing a consistent packing philosophy that aligns with how you live. By assigning clear roles to each compartment, using modular inserts to corral small items, and performing a brief daily reset, you transform a potentially unwieldy bag into a streamlined extension of yourself.
Whether you need a backpack for the gym, you’re hopping on a train, or trekking a weekend trail, the same core system can adapt to each scenario with only minor tweaks. The result is less time spent digging, a more balanced load, and the confidence that whatever you need is right where you expect it to be.
Ready to put the plan into action? Grab your current pack, lay out the zones, and start sorting. Within a few days you’ll notice the difference—fewer frantic searches, smoother transitions, and a lighter feel on your shoulders. Happy packing!